The main CircuitPython code module, code.pypreparing and operating the Clue Coffee Scale. Before using the scale, it must be updated code.py Use the calibration ratio specific to the load cell installed on the NAU7802 breakout. First, let’s take a closer look at the code and see how each section works.
8a. Import and set defaults
In this section, we will import all the required modules and libraries, including the NAU7802 sensor driver. After importing, the first task you will see in this section is to turn the NeoPixel LED on the Clue board yellow to indicate that Coffee Scale is initializing. During operation, the indicator LED lights green for normal operation and red for zeroing the scale.
Next, specify the scale defaults. These are constants whose names are capitalized to make them easier to identify as constants. You can change these values to change the behavior of the scale.
MAX_GR is the full-scale value on a scale in grams. The tick values adjacent to the graduated scale graphic are automatically derived from: MAX_GR Can be any positive integer value. Because graduated scale graphics are divided into tenths of full scale and have five numbered tick marks, it is best to choose an integer MAX_GR value that displays well, such as: 1000, 500, 250, 100, 50, 25, 10, or 5.
DEFAULT_GAIN This is the gain setting for the input signal preamplifier of the NAU7802 internal ADC. Typically this is set to the next highest value. 128.
SAMPLE_AVG Specifies the number of measurements to be averaged when measuring the load cell. The higher the SAMPLE_AVG value, the more stable the measurements. The higher the value, the slower the display updates. It’s a trade-off between stability and speed.
8b.Load cell calibration rate
CALIB_RATIO The factor used to convert the NAU7802 raw measurements to grams. This ratio must be updated after running the specific load cell calibrator method in step 9 below. This calibration ratio only needs to be measured and recorded once.
8c. Instantiate the sensor and display
The NAU7802 board is connected to Clue’s I2C bus and is located at the following address: 42 (Hex 2A). The NAU7802 24-bit ADC chip can support two load cell channels, but only the first channel is available on the Adafruit Stemma breakout board. active channel So it would be set to 1.
Clue’s integrated display is then instantiated along with the primary display. display io graphics group layer, scale groupwhich includes the background bitmap image and other display layers.
Next, define font objects to display measurements and tick labels.
8d. Displays a background bitmap image
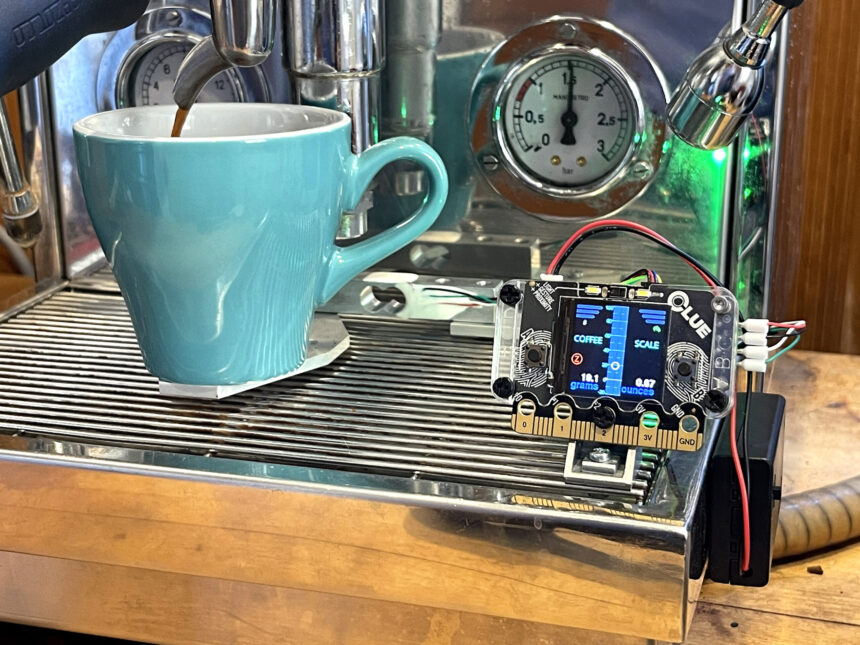
The display background file containing the graduated scale (Figure U) is read from the Clue root directory and added as the first item in the primary file. display io group layer. All other graphics objects are placed on layers above this background.
8e. Define and display text and graphics
This section defines the graphic elements that will be placed before the background graphic. First, a zero adjustment button graphic is added to the primary. display io group.
Subsections starting with I’m within range… is the code that steps through the ticks of a graduated scale and creates value labels that are calculated using the following values: MAX_GR Constants and each label display io group. Next, measurements and unit labels are added.
lastly, indicator group A floating indicator bubble is created and added to the primary display io group. of indicator group This layer is now the frontmost graphics layer on the display (Figure V).
Indicator bubbles are yellow circles that move up and down the graticule scale, pointing to measurements. The center of the circle is usually transparent, but will appear yellow or red depending on the current status of the scale. Yellow during initialization, red during zero adjustment.
8f. helper
Two helper functions work with the NAU7802 driver class to zero the scale and read the current raw value of the load cell.
of Zero channel ( ) The helper sets up and zeroes the NAU7802’s internal amplifier and ADC (Analog-to-Digital Converter) and prepares it to receive signals. Use this feature when you first power up the scale and when manually zeroing by pressing the A button on the Clue board.
Load cell raw readings are obtained in the following way: read( ) helper. This helper accepts an integer parameter that specifies the number of samples to be averaged each time the helper is called. Default is one sample (no averaging). The helper returns the averaged raw measurements. Averaging the raw values can reduce jitter in the displayed values.
8g. Activate the sensor and prepare for the loop
The NAU7802 ADC is now enabled and calibrated for use. Before calibration and zeroing, the internal sensor amplifier gain is set to the default value. Once completed, the clue will make a welcome sound.
8 hours. major code loops
The primary loop is the main operating process of the scale. The loop shows the status of the scale on the Clue board’s NeoPixel. It’s green when the scale is working, red when it’s busy zeroing.
After setting the NeoPixel color, the raw value of the load cell is measured and converted to grams and ounces. The converted value is formatted and placed in the corresponding on-screen display label and also printed in the REPL.
The gram measurement is Map range ( ) function. Also, if the gram reading is outside the minimum or maximum range, the bubble will “stop” in an extreme position and the interior color will change from transparent to red.
Finally, it monitors whether the A button on the Clue board is pressed. When pressed, Clue will make a sound and begin to scale back to zero. During the zeroization process, the NeoPixel, zeroization button graphic, and bubble center are all set to red. When the zeroing is complete, the code waits until the button is released, plays a completion sound, sets the bubble and inside the zeroing button graphic to transparent, and returns the Clue Coffee Scale to normal operation.
# Primary code loop
# Read the sensor, move the bubble and display the value
meanwhile truth:
clue.pixel(0) = clue.green # set status
Indicator is green (ready)
# Read the raw scale value and scale.
grams and ounces
value = Read (SAMPLE_AVG)
mass in grams = round(value * CALIB_RATIO, 1)
mass ounce = round(mass_grams * 0.03527, 2)
Gram value.sentence = debt”{mass_grams:5.1f}”
ounce value.sentence = debt”{Mass oz:5.2f}”
print(debt” {gram value.sentence} grams
{oz_value;sentence} ounce”)
# Change position based on indicator bubble
About gram value
min_gr = (MAX_GR // 5) * –1 # minimum value
Display value
bubble.y = integer(map_range(mass_grams,
min_gr, MAX_GR, 240, 0)) – 10
if mass in grams > MAX_GR or mass grams
min_gr:
bubble.fill in = clue.red
Other than that:
bubble.fill in = none
# Check if the zero adjustment button was pressed
if clue.button_a:
# zero the sensor
clue.pixel(0) = clue.red # set
Status indicator lights red (stopped)
bubble.fill in = clue.red # set bubble
Red from center (stop)
Zero button circle.fill in = clue.red #
Set to red (stopped)
clue.play tone(1660, 0.3) # play
“Button pressed” sound
zero channel()
meanwhile clue.button_a:
# wait until button is released
time.sleep(0.1)
clue.play tone(1440, 0.5) # play
“Reset complete” sound
Zero button circle.fill in = none # set
Transparent (ready)
bubble.fill in = none # set bubble
Transparent from the center (ready)


